How to Upgrade a VPS
What’s the point of upgrading a VPS? Upgrading a VPS makes sense when your project outgrows the current plan. More traffic, heavier apps, or limited storage can push your server to its limits. A timely upgrade keeps everything running smoothly—fast, stable, and ready to scale.
Here is a step-by-step guide on how to upgrade your VPS.
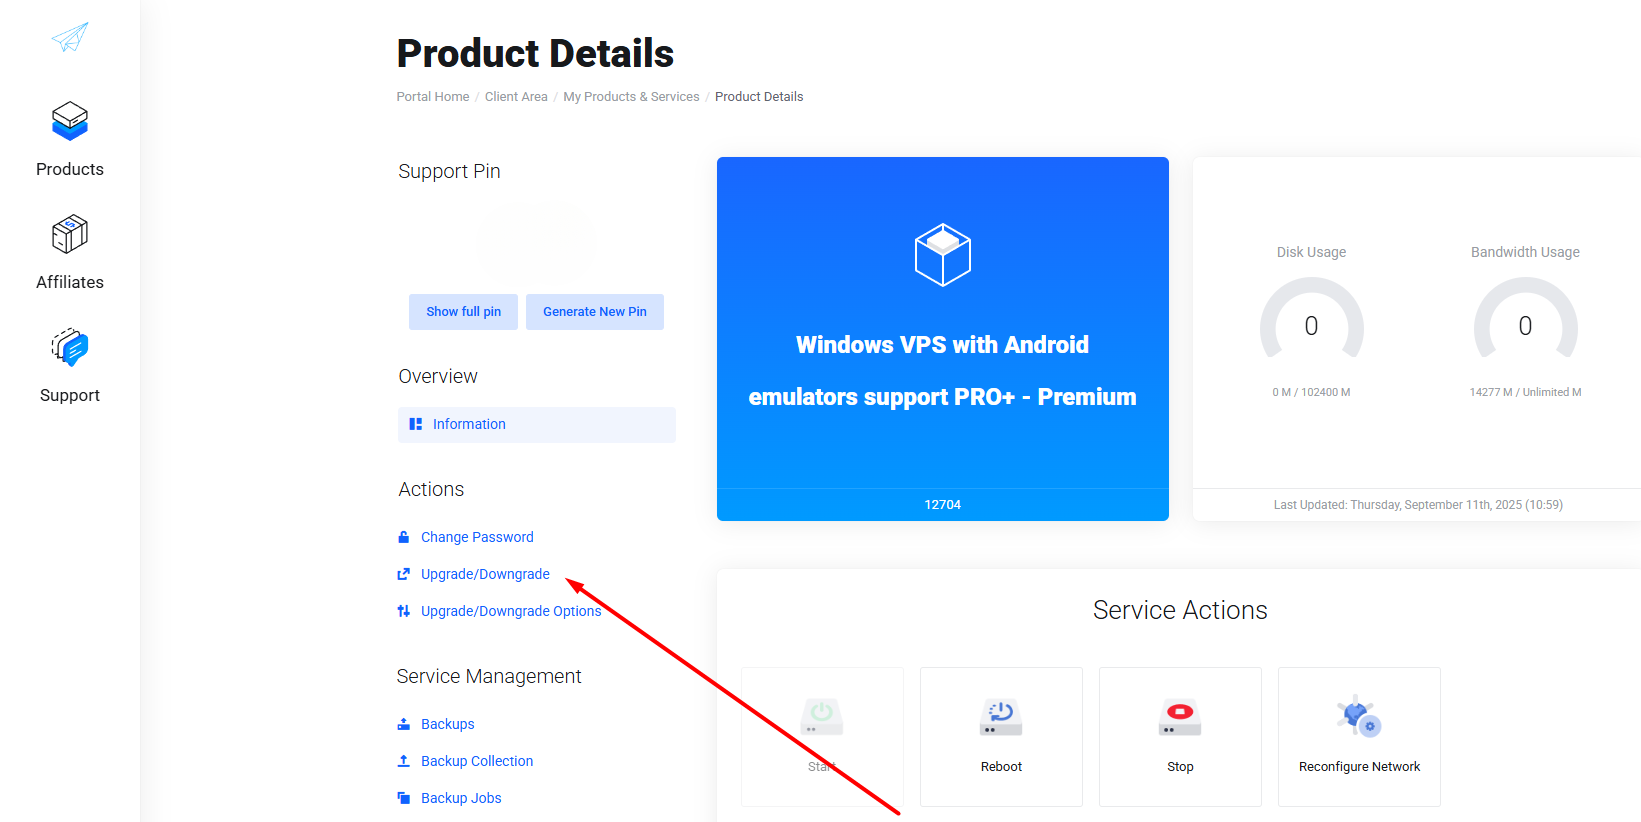
Step 1: Log in to the Client Area.
Step 2: Click on the VPS you want to upgrade under “Your Active Products/Services”.

Step 3: Click on "Upgrade/Downgrade" in the "Actions" section.
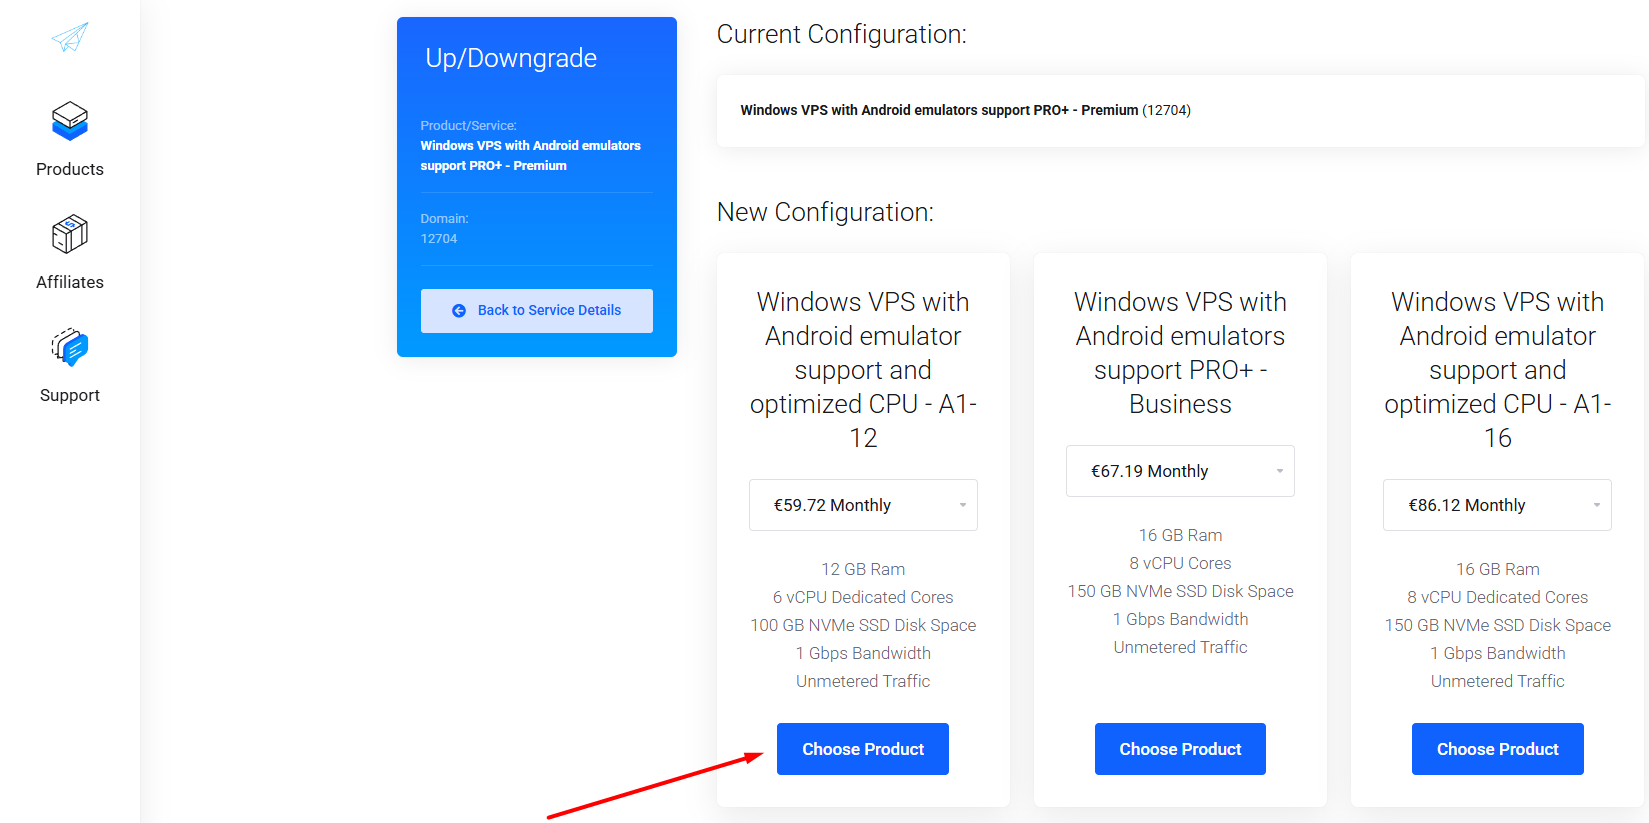
Step 4: In the "New Configuration" section, select the plan that best matches your needs and click "Choose Product".
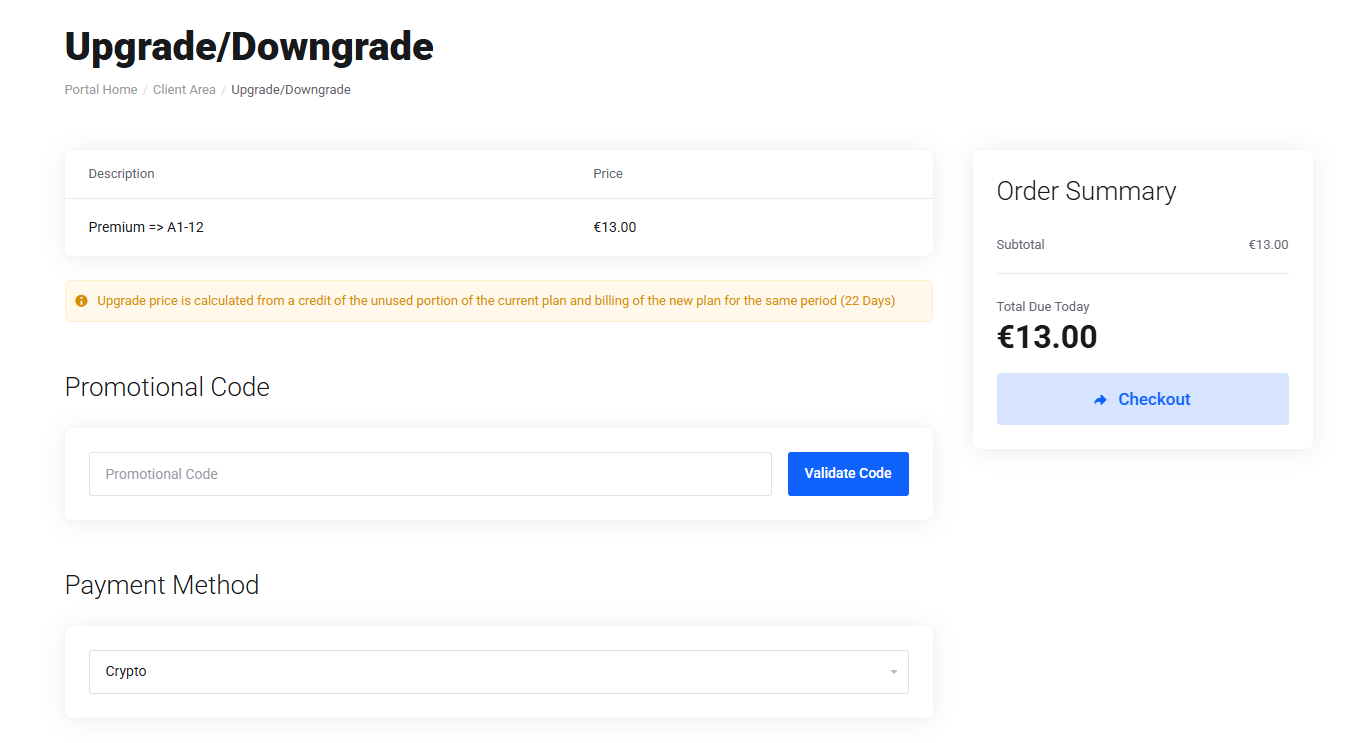
Step 5: Next, you’ll need to pay the difference between your current VPS plan and the upgrade. Click "Checkout" to complete the payment.

Step 6: Once the upgrade payment is complete, reboot your VPS to apply the changes.
Important: If you’re upgrading your VPS from Pro to Pro+ or switching to a different operating system (for example, from Linux to Windows or vice versa), you’ll need to perform a reinstall. Keep in mind that the reinstallation completely removes all files, applications, and settings currently stored on the server.
How to Reinstall a VPS: You can find a short guide at this link. In all other cases, simply reboot your VPS to apply the changes - no need to reinstall.
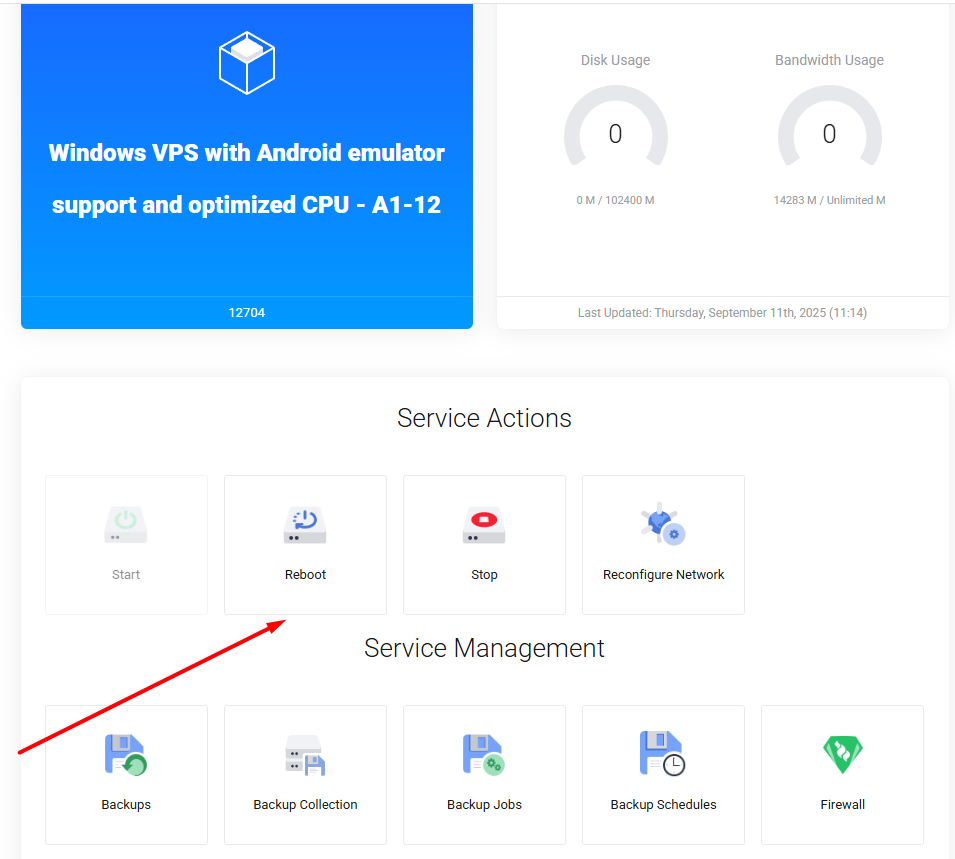
All set! Your VPS upgrade is complete, and it’s ready to use.
Thank you for choosing PetroSky!


